Frontend Deployment
Frontend Deployment
To enable the front-end to listen to IoT topics for ride time notifications, you will need the following two values:
- IoT endpoint hostname
- The Cognito Identity Pool ID.
In this section, you will retrieve these values and update the front-end configuration. After making changes, you will commit the changes to a git repo, which will automatically republish the app using Amplify Console.
- Go back to your browser tab while Cloud9 is running.
- Run this command to display Id IdentityPool:
aws cognito-identity list-identity-pools --max-results 10

- Run command to display IoT endpoint hostname
aws iot describe-endpoint --endpoint-type iot:Data-ATS
- Run command to display AWS REGION
echo $AWS_REGION

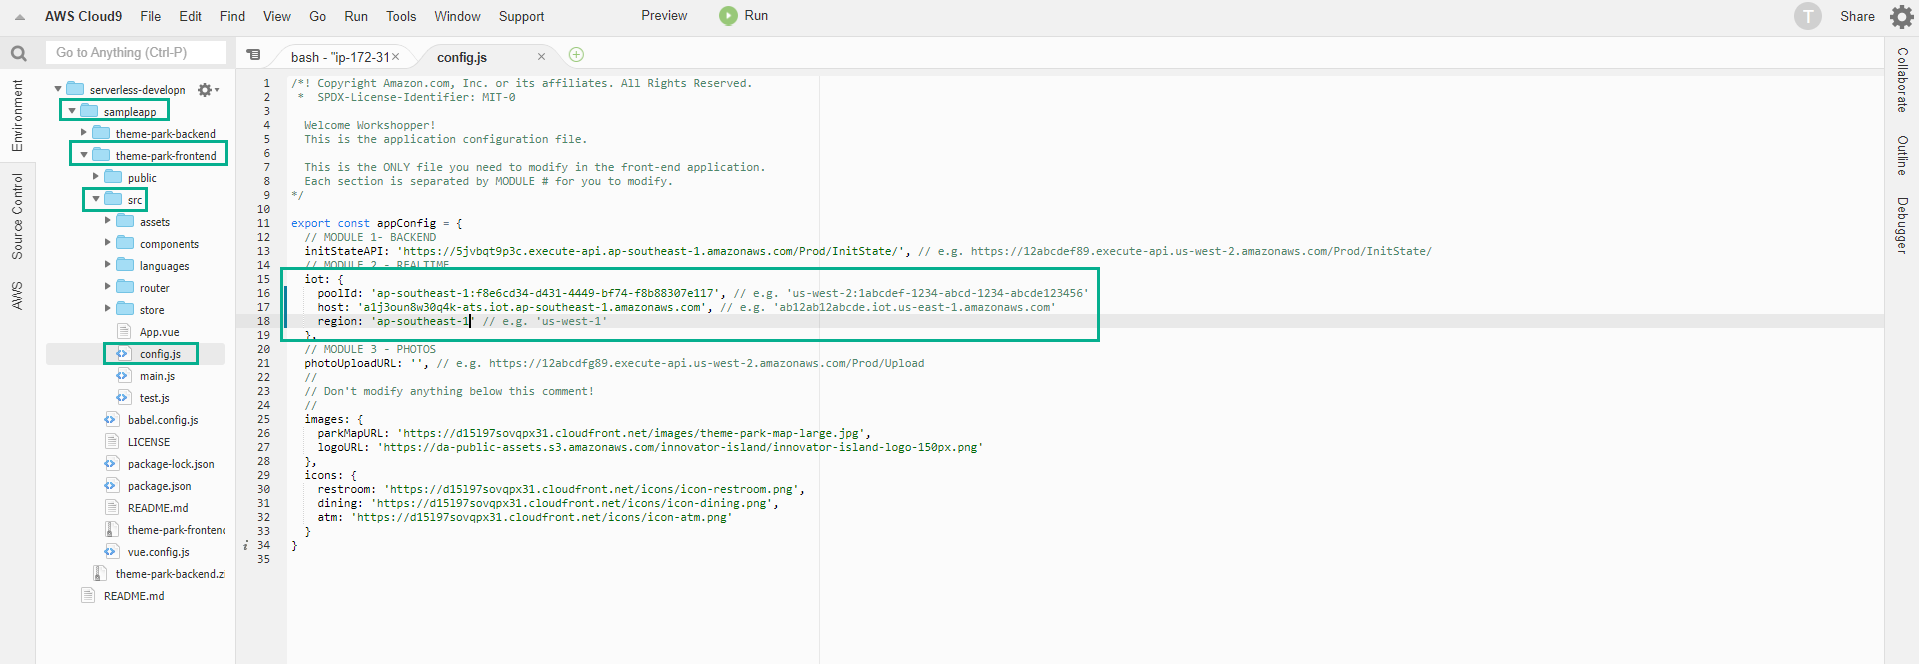
- In Terminal Cloud9, in the left directory panel, navigate to theme-park-frontend/src.
- Find the config.js file and double click to open it in the editor.
- This file contains the JSON configuration for the front-end. The file is separated into the respective modules.
- In the MODULE 2 section at the top of the file, update the IoT properties as follows:
- poolId: set to IdentityPool Id from above.
- host: set to IoT endpoint hostname from above.
- region: set to your AWS_REGION from above (eg ‘ap-southeast-1’).
- Use Ctrl + S to save the file.
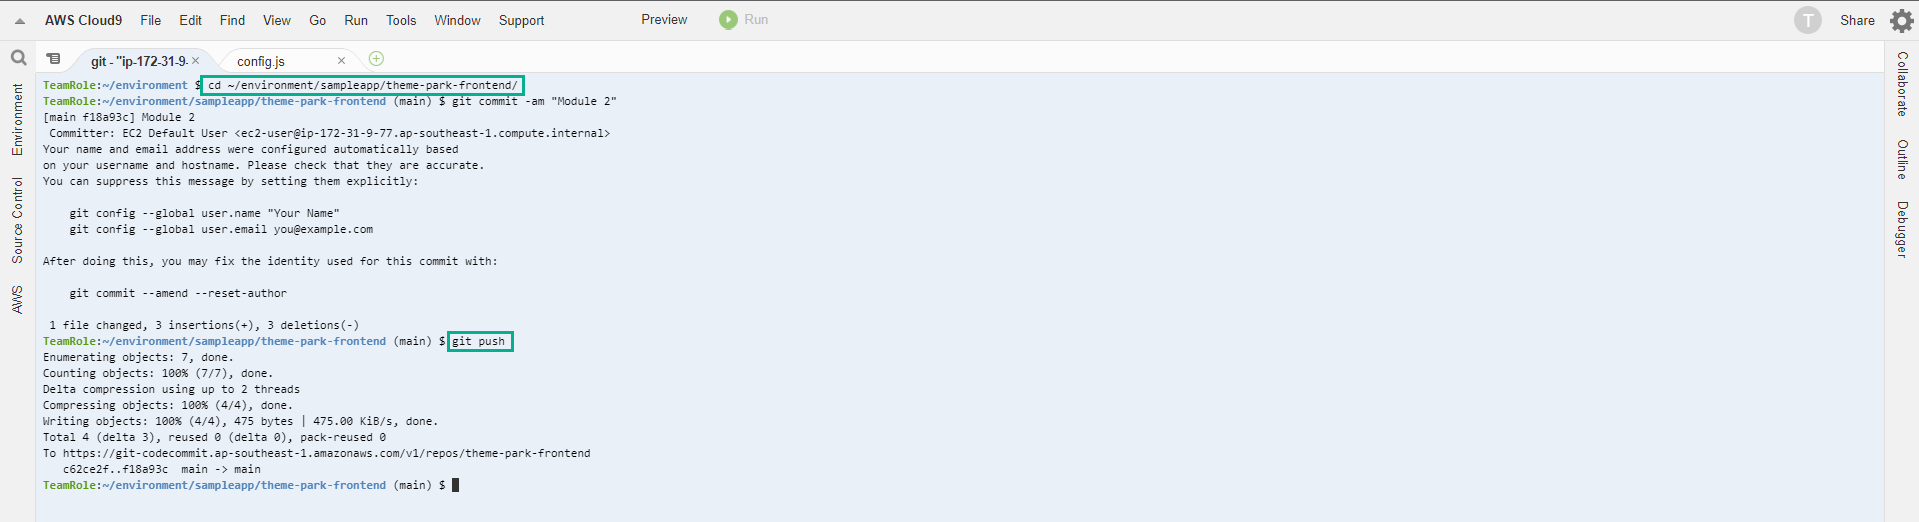
Push CodeCommit and deploy via Amplify.
- In the Cloud9 Terminal, change to the front-end directory with the following command:
cd ~/environment/sampleapp/theme-park-frontend/
- Commit CodeCommit by executing the following commands:
git commit -am "Module 2"
git push
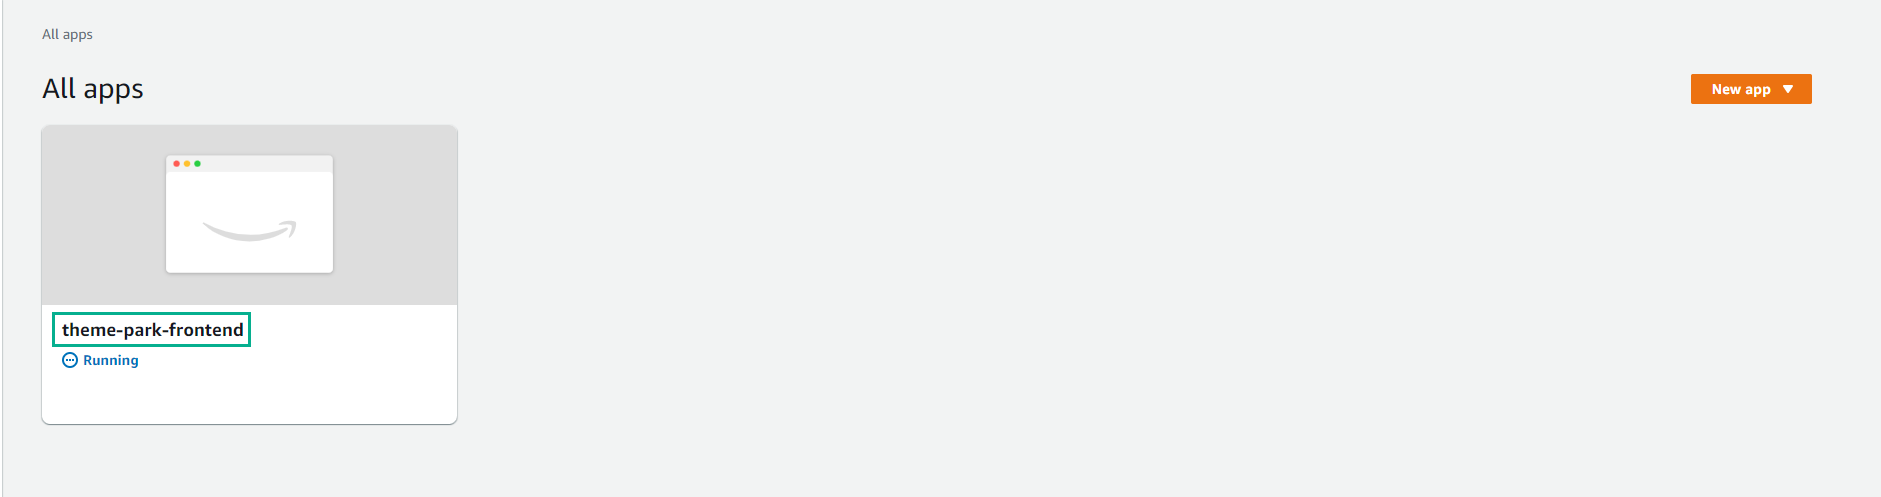
- After completing the commit, go to Amplify Console. Make sure Region is correct.
- In All apps page, Select theme-park-frontend
- You should see a new build automatically started as a result of the new commit in the base code repo. This build will take a few minutes.
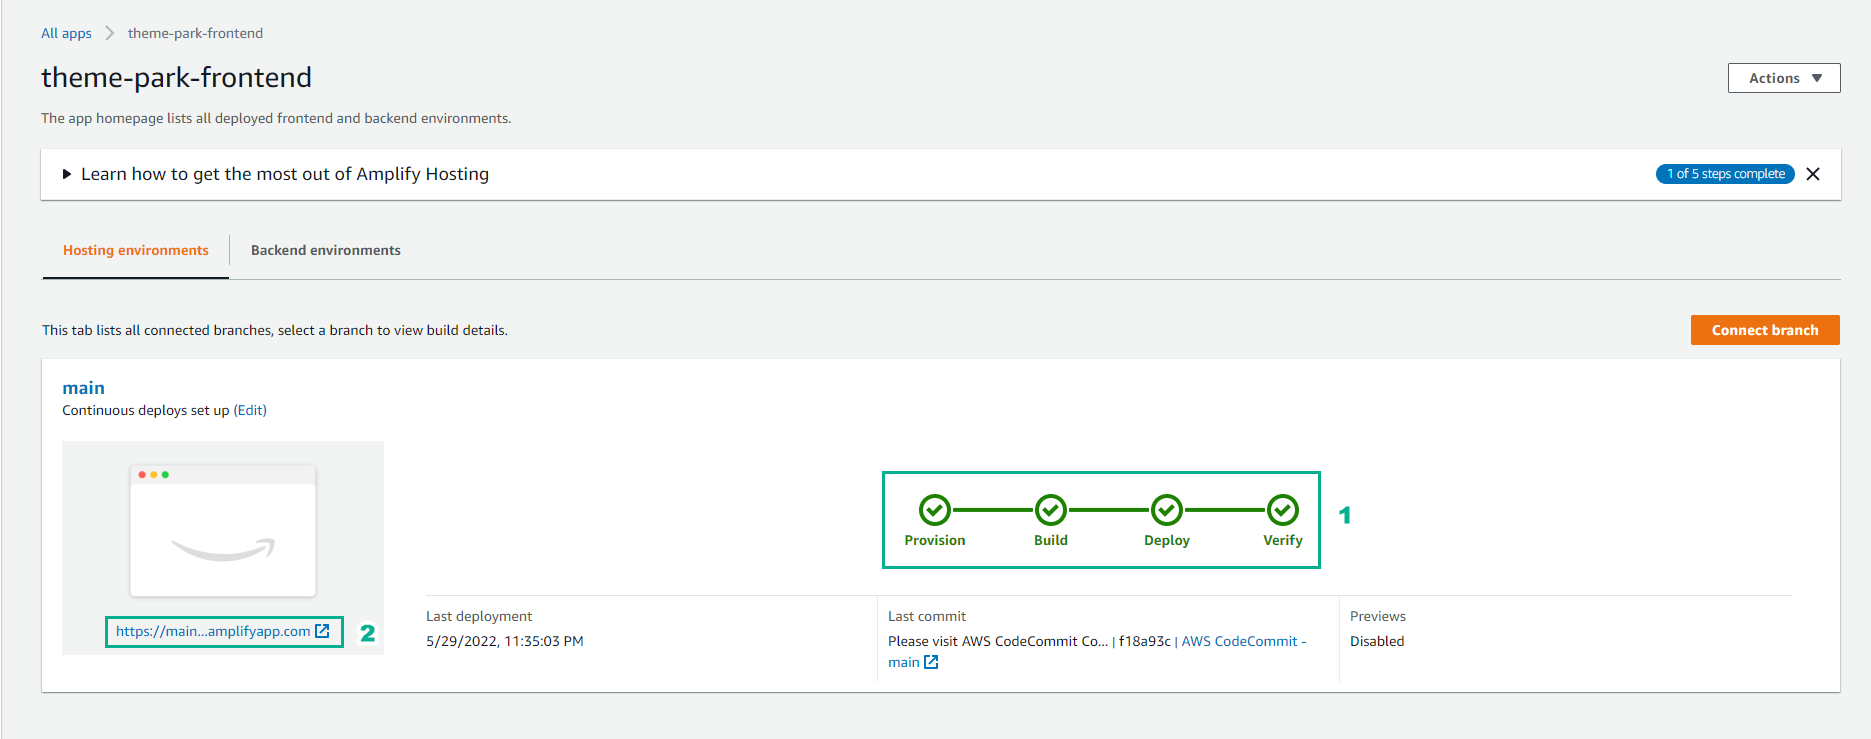
- Open the published app URL in the browser.
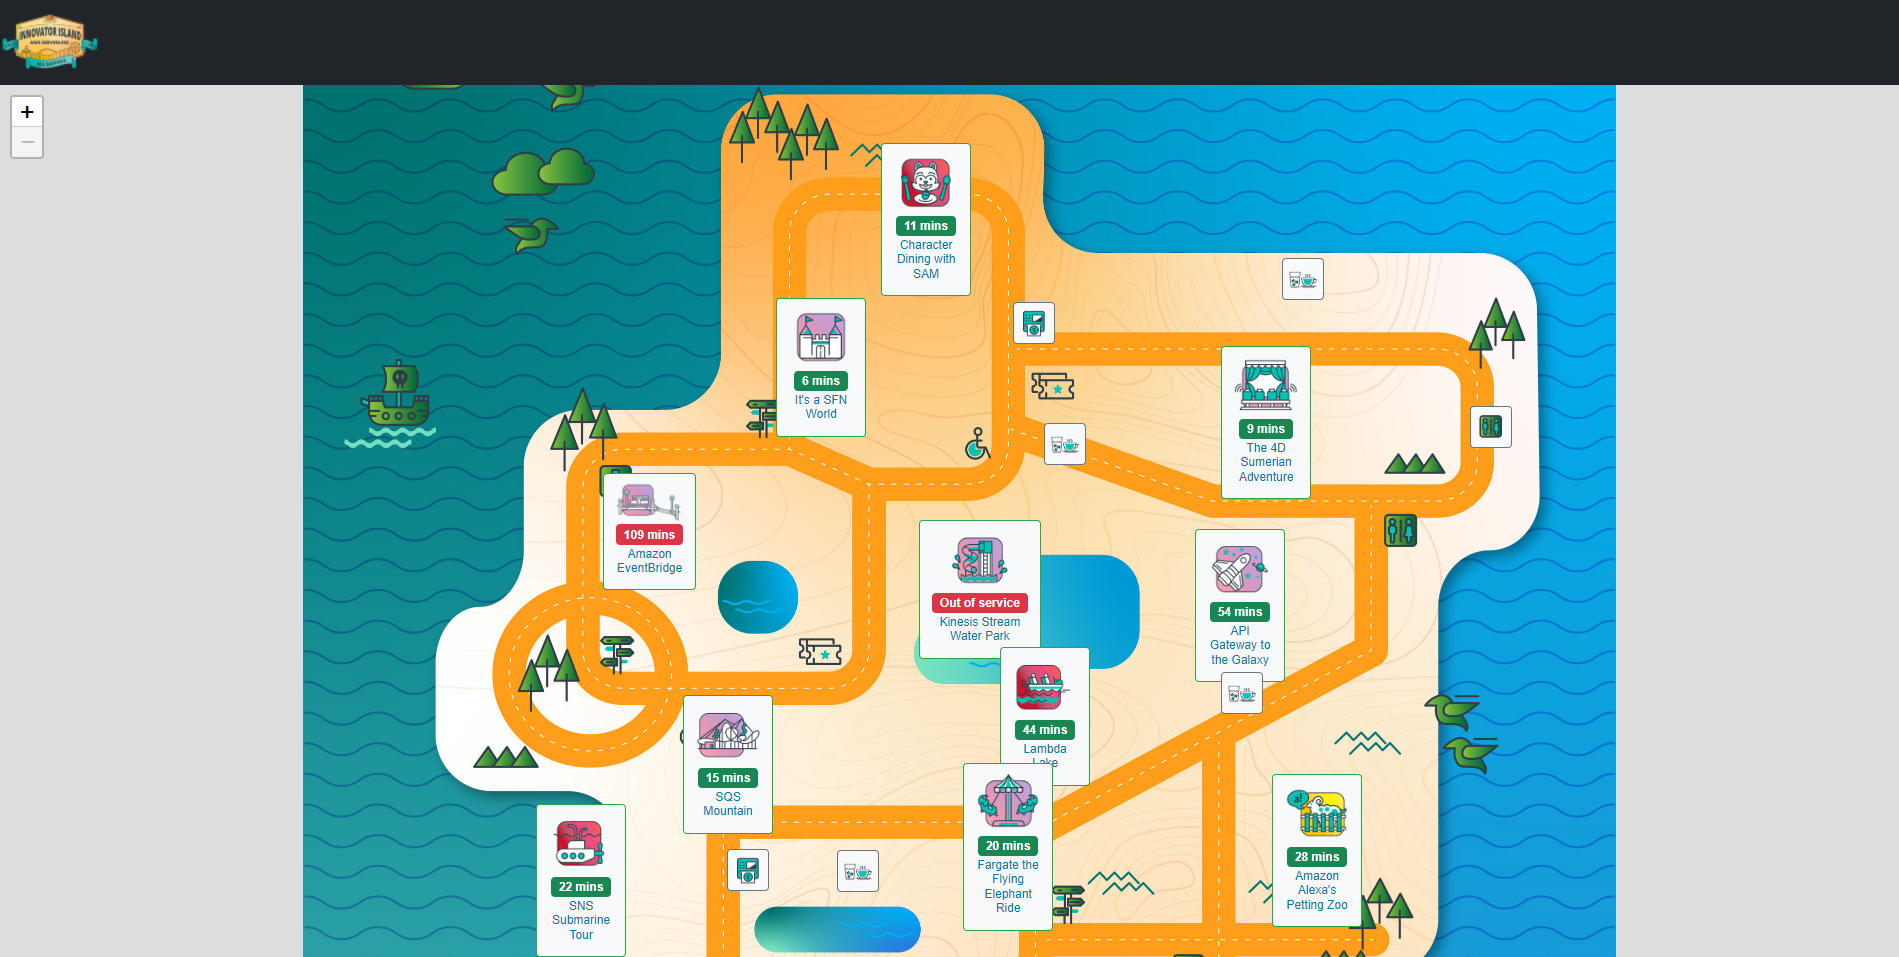
You can now see rides and attractions on a theme park map that shows real-time wait times and updates every minute.